

| Home | About Us | Services | Products | Support | Contact Us |
Introduction
In order to 'talk' to the ADSL router you need to configure both the computer and the router to be on the same 'netmask' which requires the IP addresses of the router and computer to match certain values.
An IP address consists of four numbers separated by .'s. The router generally comes factory set with an IP address of 192.168.1.254 (but check the router manual for confirmation).
A netmask determines which of the three numbers are the same on all devices you want to talk together. A value of 255 means that the number is the same, whereas a value of 0 means the number can vary.
For example, if both devices have a netmask of 255.255.255.0 (usual default) then it means that in order to communicate with each other, each device must start with the SAME three values in the IP address. The fourth will vary for each device.
These instructions are primarily aimed at RISC OS users, but should be fairly generic.
Step 1
You need to configure the computer to be on the same 'network' and 'netmask' of the router.
As explained above, the netmask should be set to 255.255.255.0 which means that the first three numbers of all local IP addresses have to be the same.
As the router is set to 192.168.1.254 the IP address of the computer should be 192.168.1.x where x is a number different to the router, and also different to any other computers you have on your network.
To start, I'd recommend using 192.168.1.10
Set the computers IP address to this value, either consulting the computers manual/instructions or seeing my separate notes on configuring the IP address on RISC OS.
Step 2
Once you've set the IP address on the computer, ensure that all relevant leads are connected between the network socket on the computer and the LAN socket on the router.
Load a web browser on the computer and enter http://192.168.1.254 in the URL bar. Press return and you should be connected to the router and a welcome/configuration screen should be displayed in your browser.
If step 2 works, then you can continue. If you don't get anything in step 2 then it would appear that the computer is not talking to the router correctly. You should try PINGing the router from the computer (to check the physical connection). To do this, press f12 (to get a command line prompt) and type the following;
PING 192.168.1.254
Press return and see what happens. You should get some values printed on the screen indicating a link. If you don't, then you need to check the IP address of both the router and computer to make sure that they are both on the same network and have the same netmask.
Step 3
If you can 'talk' to the router from your web browser, you should now be asked for a username and password in order to configure the router.
The default username is admin
The default password is also admin
After entering both, and clicking to continue you should access the main 'Web Configurator' screen (fig.1)
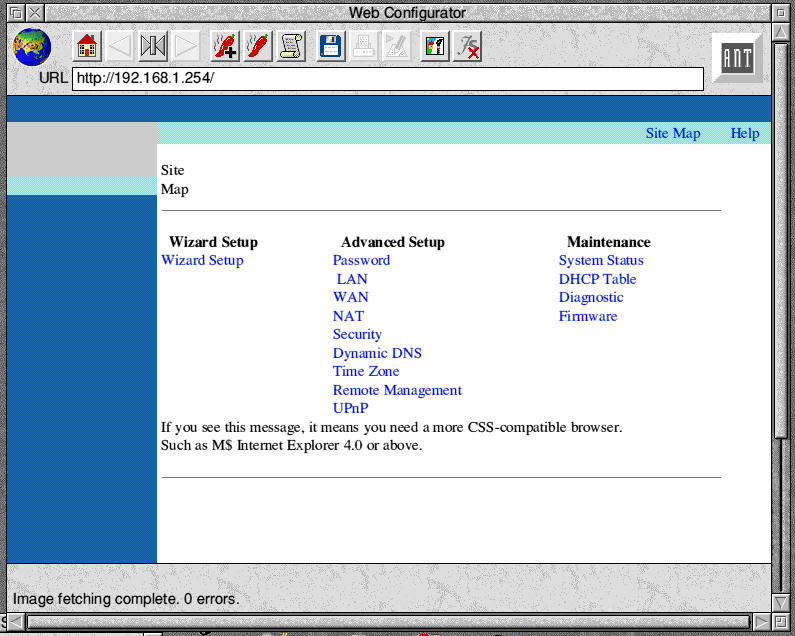
Fig.1
Click on 'Wizard Setup' in the left hand column.
Step 4
You now need to go through the setup wizard (fig.2)
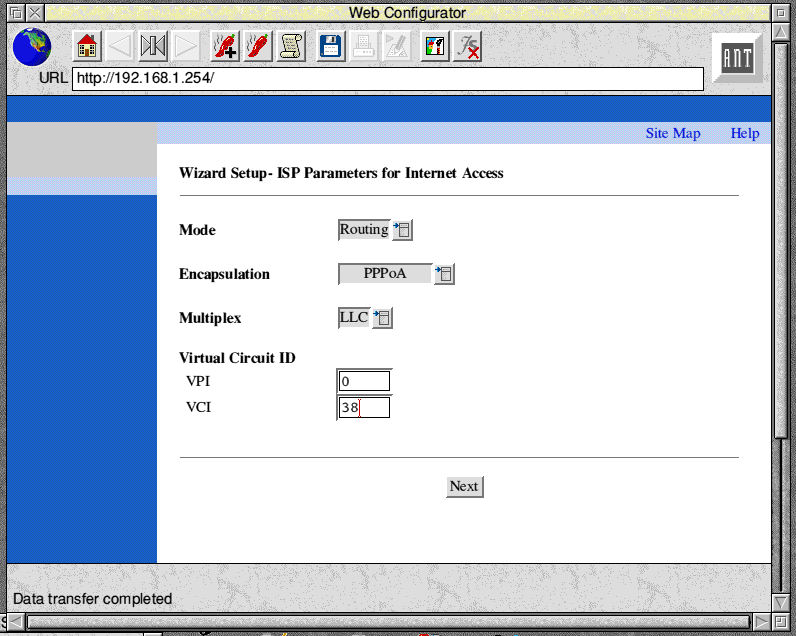
Fig.2
The initial screen requires the following settings:-
     Mode: Routing (Routing, Bridge)

 Encapsulation: PPPoA (PPPoA, RFC 1483, ENET ENCAP, PPPoE)

     Multiplex: VC (VC, LLC)

     Virtual Circuit ID
           VPI: 0
           VCI: 38
Now click on 'Next'.
Step 5
It will now ask you for the username/password information and the type of connection you want (fig.3).
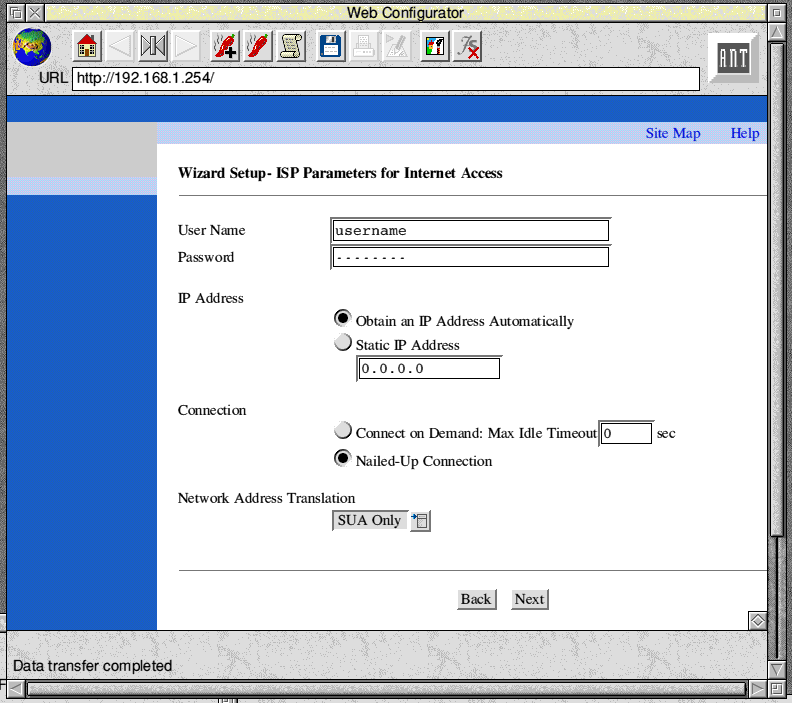
Fig.3
This is the username and password required for your broadband connection and should have been supplied to you separately by your ISP when you got your broadband details.
User Name - enter your username
Password - enter your password
IP Address - leave as 'Obtain an IP Address Automatically' if you're using a dynamic IP address, otherwise tick the 'Static IP Address' box and enter the required IP address in the box.
Connection - Set to 'Nailed-Up Connection' for a permanent broadband connection.
Network Address Translation (NAT) - Set to 'None'
Click on 'Next'
Step 6
You should now see a summary of all the settings (fig.4). Confirm that they are correct and click on 'Save Settings'.
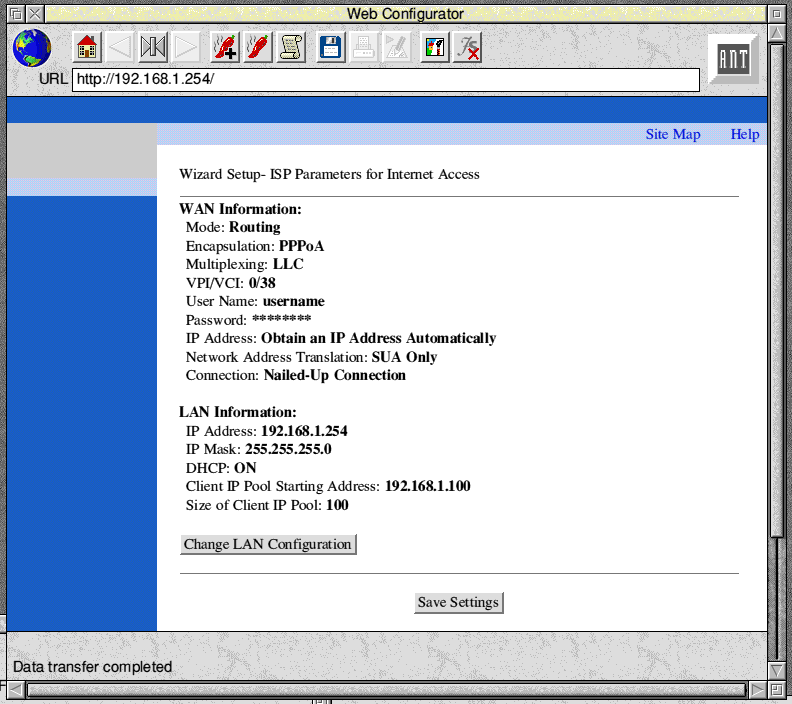
Fig.4
Step 7
It will then give you the option of performing a diagnostic test on the connection, using your newly entered settings. Click on 'Start Diagnose' to carry out this test.
Step 8
You should now be able to go back to the computer network settings and set your gateway address to that of the router and now connect to the internet.
You should now be able to visit external webpages, such as
http://www.bbc.co.uk
Complete!